
Film
Process
Firstly, I went out and took photos using a film camera. I then took the film out of the canister in a dark bag. Next, I developed the film strips using the developer at a 1 to 9 ratio (5 minutes 30 seconds, none stop first 30 seconds and last 30 seconds), and then the stop solution at a 1 to 19 ratio (30 seconds). Lastly, I added the fix solution at a 1 to 9 ratio (same possess as the developer). Then to develop the film I transferred it onto the light sensitive paper, then put it into the developer at a 1 to 9 ration and agitated it for 60 turns, I then moved onto the stop solution at a 1 to 19 ration to stop it from developing and did this for 40 turns. Finally, I put it into the fix solution at a 1 to 9 ratio for 60 turns and then washed it off with water and allowed it to dry.
Annotation
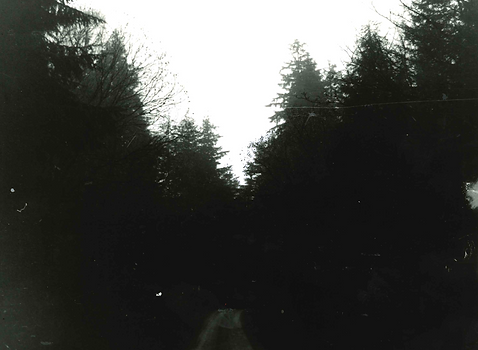
I like how a lot of my film photos came out, even though most of them came out a bit pixelated I feel that it adds a layer of uniqueness to the photos. Moreover, some images came out a bit dark, but I think it gives a mysterious element to the photos. I also like the simplicity of some of the photos as I feel like some elements of nature are often overlooked by some, such as the contrast between the leafless trees and the sky. However, some of my pieces were very blurry or too dark, thus I had to cut them from my work as they did not look good, or wouldn't fit into my project.


Photograms
Process
To make these photograms I first prepared my solution in three different trays, in the first tray I put in the developer at a 1 to 9 ratio, then in the second tray I put in the stop solution at a 1 to 19 ratio, this prevents the photogram from developing further. In the last tray, I added the fix solution at a 1 to 9 ratio. Then I used light-sensitive paper, placed my flowers on top of it and exposed it to light for around 6 seconds. Next, I put the photogram into the developer and swished it around 60 times. I then put it into the stop solution and swished it around 40 times, then I moved on to the fix solution and again swished it around 60 times. Then to finish off I washed my photograms thoroughly with water to make sure all the chemicals had been washed off, I then left it to dry.


I overexposed this piece to light for too long, however, I still like how it turned out as it is unique from my other pieces and I do like how the grey looks, but it does become too dark in parts so it's hard to see bits of the flower.
I really like how the (insert flower name) looks in this photogram, I think that it captures the detail of the flower and overall it just works well. I feel although the rose in this image lacks dimension and detail.


The flower on the left came out really detailed and overall, it just looks good. However, I feel although the rose and leaves look good, they lack the detail the flower on the left has, but I do like how some bits on the rose are white and some are grey as it makes it look as although it's being pressed against something or like the light is only covering part of it.


I like how both these work in a photogram as I feel although you can see the detail in the flowers more than other flowers due to how fine some parts of the flowers are.
I think that these were some of my most successful pieces, as in the first I like how gradiented the flowers are, but in the second I like how clean and crisp my artwork looks.
I really like how my leaf photograms looked as I feel like although not detailed they still look cool and bring about a filling element to the photogram, I also like how crisp they look in a photogram.
I am unsure on if I like this piece, as I think the flowers lack detail, and on the third flower there is a hint of black that makes it look less crisp than I would hope for.